
Kei Camper Conversion Guide
 Crafting a personalized camper offers immense satisfaction. Many DIY enthusiasts discover unique foundations for their projects. Japanese Kei trucks and vans present excellent platforms for such builds. These compact vehicles offer surprising versatility. You can transform them into efficient, go-anywhere homes. This guide explores the fascinating world of Kei camper conversions.
Why Choose a Kei Vehicle?
Kei cars, trucks, and vans originate from Japan. Strict government regulations promote their small size. Owners enjoy lower taxes and insurance premiums. These vehicles boast impressive fuel efficiency. Their compact dimensions allow access to tight trails. Parking in crowded cities becomes much simpler.
Furthermore, their robust mechanicals offer reliability. Parts are generally affordable and available. A growing global community supports Kei vehicle owners. These factors make them ideal for budget-conscious adventurers.
Step 1: Vehicle Selection
First, choose your base vehicle carefully. Kei trucks like the Suzuki Carry or Honda Acty offer an open bed. This space provides a clean canvas for a custom box camper. Kei vans such as the Daihatsu Atrai or Subaru Sambar feature enclosed bodies. These vans suit pop-top or fixed-roof interior builds.
Consider the vehicle’s condition thoroughly. Check for rust, engine health, and transmission issues. A solid foundation prevents future headaches. Research common problems for your chosen model. Buy from a reputable dealer or private seller.
Step 2: Planning Your Layout
Next, design your interior layout meticulously. Measure the internal dimensions of your Kei vehicle precisely. Sketch various floor plans on paper or use software. Include essential components like a bed, cooking area, and storage. Think about water storage and electrical systems early.
Prioritize functionality over excessive features. Every inch counts in a small space. Consider multi-purpose furniture. A bench might transform into a bed at night. Ensure good airflow and natural light. Large windows make a small space feel open.
Step 3: Body Preparation
Prepare the vehicle’s body for conversion work. Remove any unnecessary seats or interior panels. Clean the interior thoroughly to eliminate dirt and grime. Address any existing rust spots immediately. Treat metal surfaces with a rust converter. Apply a protective primer to all exposed metal.
Seal any holes or gaps to prevent water intrusion. A waterproof interior ensures longevity. Consider adding sound deadening material. This step reduces road noise significantly. It also improves insulation properties.
Step 4: Insulation Installation
Insulation is critical for comfort in any climate. Choose lightweight, high-performance materials. XPS foam boards or rigid polyiso panels work well. Cut the insulation to fit tightly against walls, ceiling, and floor. Use construction adhesive to secure the panels firmly.
Seal all seams with foil tape to create a vapor barrier. This prevents condensation buildup inside the camper. Proper insulation keeps you warm in winter. It also helps keep the interior cool during hot summer days.
 Step 5: Flooring and Paneling
Install your chosen flooring material next. Plywood forms a sturdy subfloor over the insulation. Cover the plywood with durable vinyl or laminate. These materials withstand wear and tear effectively. They also clean up very easily.
Panel the interior walls and ceiling. Lightweight plywood or tongue-and-groove planks look great. Ensure all cuts are precise for a professional finish. Sand and paint or stain the wood panels. This protects the wood and enhances aesthetics.
Step 6: Furniture Construction
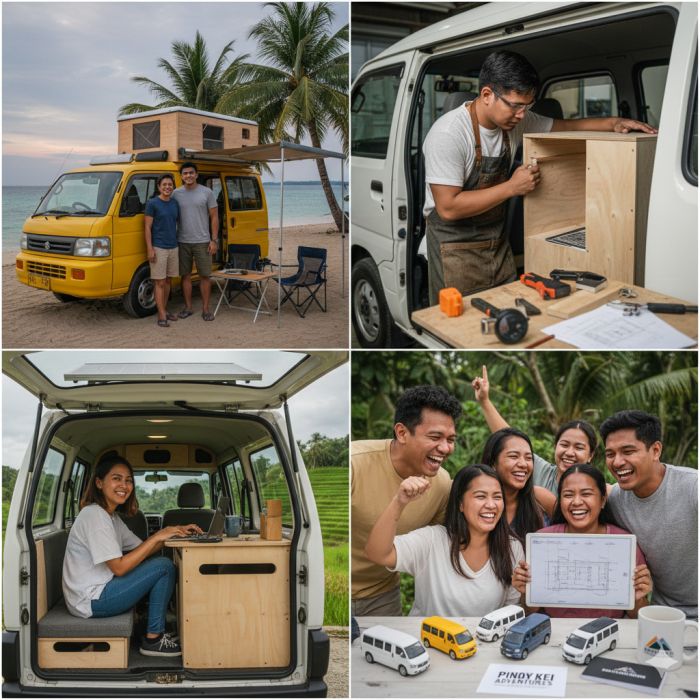
Build your interior furniture carefully. Use lightweight plywood or marine-grade lumber for frames. Secure all components firmly to the vehicle’s body. Over-cab storage areas are very useful. Consider a convertible dinette that becomes your bed.
Install shelves, cabinets, and cubbies for storage. Maximize vertical space whenever possible. Custom-fit cushions improve comfort greatly. Design furniture for easy access to all areas. Every piece serves a purpose in a small camper.
Step 7: Electrical System
Plan your electrical system next. A separate leisure battery powers your amenities. Connect this battery to a solar panel on the roof. Install a charge controller to manage power flow. Add an inverter to convert DC power to AC.
Wire outlets for charging devices and running small appliances. Use LED lights for efficient interior illumination. Fuse all circuits properly for safety. Consult an auto electrician if unsure about wiring diagrams.
Step 8: Water System
Consider a basic water system for convenience. Install a small freshwater tank and a greywater tank. Use a hand pump or a small 12V pump for water delivery. A small sink with a faucet is a great addition. You can also install an outdoor shower for quick rinses.
Ensure proper ventilation for your water system. Prevent mold and mildew by keeping things dry. Drain tanks completely during freezing weather.
Step 9: Finishing Touches
Add personal touches to make your camper truly yours. Install curtains for privacy and light control. Mount a small fan for air circulation. Add hooks and nets for extra storage solutions. Decorate with items that bring you joy.
Test all systems thoroughly before your first trip. Drive short distances to check for rattles or loose parts. Enjoy the freedom your new Kei camper provides. These mini adventure vehicles offer huge possibilities.
This Post Has 0 Comments